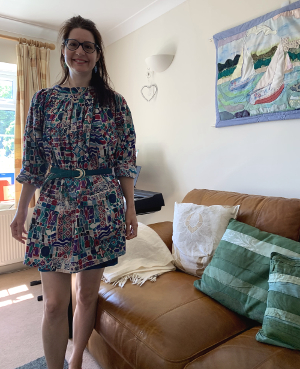
 Finished Dress with Interior Textiles |
Buying second hand and vintage clothing like this colourful Pierre Cardin skirt is better for the environment. It is worth re-cutting, customising and upcycling pieces you already own as it is a fun way of personalising your wardrobe and it ensures you use everything you have, for as long as possible.
As this dress is meant to be floaty and roomy to allow for wearing on hot days I am keeping the construction super simple. To start I laid the ironed skirt spread out flat, making sure the button and zip of the skirt is exactly at the middle of the back of the skirt, against the table.
|
 Skirt to Dress Upcycle 1 |
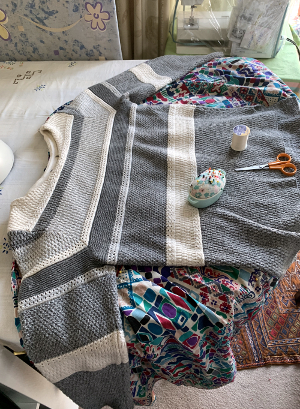
Step 1: Firstly take a garment from your existing wardrobe that fits and hangs well and use the shape as a guide for creating the arms and the body of the garment. This stripey Laura Ashley cotton jumper is perfect as a guide. Plus it will lie flat easily and not move around like other more silky shirts might. I pin around the outline of the jumper and allowing 20mm for a seam allowance around the sweater and cut the new shape out of the skirt. I ignore the bottom hem of the jumper though, as I want my dress to be as long as the drop of the skirt was, finishing just a couple of centimetres above my knees. |
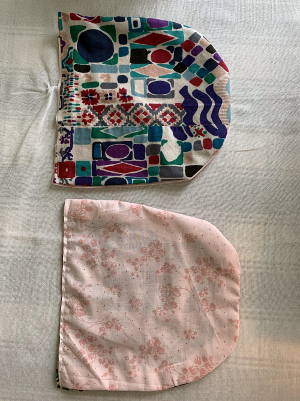
 Cutting Dress Pockets |
Step 2: Secondly, turn the two main pieces inside out. They are joined at what was the waistband of the skirt and is now the neckline of the dress, already complete with a zip and a button at the back of the neck.
Step 3: Thirdly sew along the sides and underneath what will now be the sleeve edges on both sides reveal the dress shape ready to go. Make sure to leave generous openings for the hands and armholes to make sure that popping this tunic on a breeze. Turn the garment right side out again and lay front face up on the table.
|
 Dress Pockets Ready to Stitch |
Step 4: The fourth step uses the lovely cut out fabric from the extra skirt width, which is now not needed. These offcuts are perfect for constructing a pair of useful pockets. Just make a template out of a piece of unwanted A4 printer paper (from your recycle bin) by folding the paper in half lengthways and using paper scissors to cut a curved shape that will fit the size of your hands neatly.
Step 5: The fifth step is to cut out your pocket pieces and as before, leave a 20mm hem around the template.
|
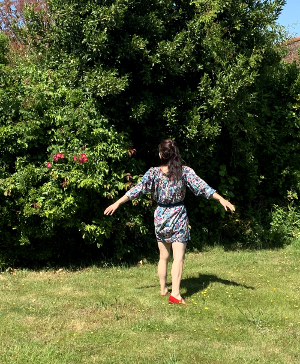 Finished Dress in the Garden |
Then cut out two lining pieces in exactly the same way. Pin the 'wrong' pocket sides together and sew around the edges leaving a gap that is large enough to pull the fabric the right way around again.
Step 6: Then press and sew the gap up and you will have two pretty shaped pockets. Position the pockets on the front of the dress so you can put your hands into them easily at the right height and pin. Then just sew the pockets onto the front of the dress leaving them open and accessible at the top and sewing neatly along the edges of the lined pockets to keep them in place. |
|
Your dress is now ready to wear, just a belt in a coordinating colour if you like to highlight your waist. This dress is fairly short in length but it has long sleeves that look good simply rolled up, so it is perfect for hot summer days. As the mornings and evenings become cooler, cosy up by adding layers. |
Co-ordinating tights, leggings, a cardigan or jacket all work well. Add boots and a pashmina style wrap. and you are all set for Autumn.
|